Essential Woodworking Tools: Must-Have Tools and How to Use Them Effectively
Woodworking can be an enjoyable and rewarding hobby, but you need the right tools to get the best results. Whether you’re a beginner or an experienced woodworker, having a set of essential tools will make your projects easier, faster, and more precise. Knowing how to use these tools effectively is just as important as owning them, so it’s crucial to understand their functions.

From measuring and cutting to sanding and assembling, each tool serves a specific purpose in woodworking. Some tools help you make straight, accurate cuts, while others are essential for adding finishing touches like smooth surfaces or sturdy joints. A good mix of hand tools and power tools will give you the versatility to tackle various woodworking tasks.
However, it’s not just about owning these tools; it’s about using them the right way. With proper techniques, even basic tools can help you create high-quality projects. For example, learning how to make precise cuts with a hand saw or how to clamp pieces together for strong joints will take your woodworking skills to the next level.
In this post, we’ll walk you through the must-have woodworking tools and offer tips on how to use them effectively. Whether you’re building your toolkit or looking to improve your skills, this guide will help you work more efficiently and get the most out of your tools.
Guide To The Must-Have Woodworking Tools
 1. Measuring Tools
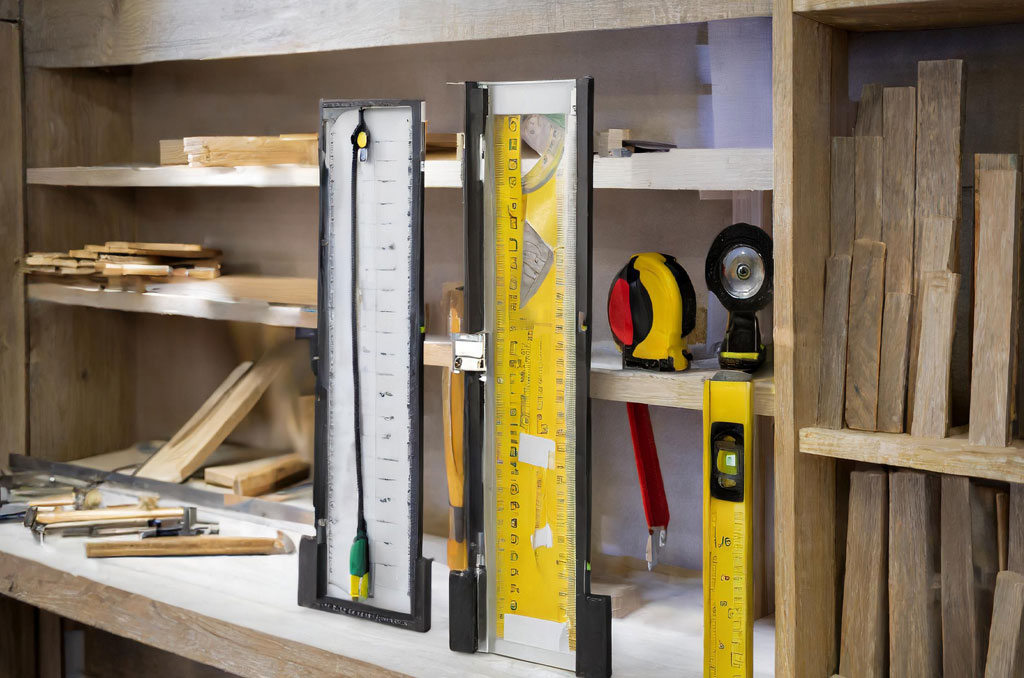
Measuring tools are the foundation of any woodworking project because accuracy is critical to creating well-crafted pieces. Without precise measurements, your cuts, joints, and overall project can easily go off course. One of the most important measuring tools is the tape measure. A tape measure allows you to measure the length, width, and height of your wood pieces, ensuring everything fits together properly. When using a tape measure, make sure to lock it in place once you’ve taken your measurement to avoid errors.
Another essential tool is the combination square, which serves multiple purposes. It helps you measure and mark 90-degree angles, ensuring your cuts are straight, and your joints fit perfectly. A combination square can also be used for marking 45-degree angles, making it useful for cutting miters or creating precise bevels. To use it effectively, hold the stock of the square firmly against the edge of your workpiece and draw a line along the blade for an accurate guide.
The marking gauge is another useful tool, especially when it comes to marking lines parallel to the edge of a board. This tool allows you to scribe lines at a consistent distance from the edge, making it ideal for cutting mortises or tenons. To use a marking gauge, set the desired measurement by adjusting the head, then run the gauge along the edge of the board to create a precise, shallow line that guides your cuts.
Lastly, for finer and more detailed work, a caliper is a must-have tool. Calipers are ideal for measuring small distances and thicknesses with great accuracy, which is especially useful for fitting joints tightly or ensuring that two parts are of equal size. They can measure internal and external dimensions, and some models come with digital displays for extra precision. By using these measuring tools effectively, you ensure that every part of your project fits perfectly, resulting in professional-quality woodworking.
2. Hand Saws
Hand saws are among the most basic yet essential tools in woodworking, perfect for cutting wood precisely without the need for power tools. One of the most common types is the crosscut saw, designed for cutting across the grain of the wood. Its sharp, evenly spaced teeth make it great for making clean, straight cuts. To use a crosscut saw effectively, start by making a shallow groove at the cutting line with gentle forward strokes. Once the groove is established, apply steady pressure and use long, smooth strokes to guide the saw through the wood. This method reduces tear-out and ensures an even cut.
Another essential hand saw is the rip saw, which is designed for cutting along the grain of the wood. It has larger, chisel-like teeth that are spaced farther apart, making it easier to cut through thick or long boards. When using a rip saw, focus on maintaining a straight line while applying consistent pressure. To ensure accuracy, it helps to clamp the wood securely to a workbench and make sure your body posture allows for controlled, steady movement of the saw.
For more detailed and intricate cuts, the coping saw is a great tool. This saw is perfect for cutting curves or intricate shapes, such as those needed in decorative woodworking or fitting joints. The thin, narrow blade is held in a U-shaped frame, allowing for excellent maneuverability. To use a coping saw effectively, hold it with a light grip and guide it carefully along your marked line, using slow, controlled strokes. The key is not to rush, as precision is crucial when cutting complex shapes.
Finally, the back saw is another highly recommended hand saw, known for its rigid spine that helps create precise, straight cuts, particularly in joinery work. It’s commonly used with a miter box for cutting angles or making fine, detailed cuts in furniture making. To use a back saw effectively, position the saw in a miter box if cutting angles, or carefully align it to your marked line for straight cuts. The rigid spine provides added stability, helping to guide the saw accurately through the wood. With practice, hand saws can produce clean, professional cuts, giving you greater control over your woodworking projects.
3. Power Drill
 A power drill is one of the most versatile and essential tools in woodworking, offering both speed and precision for drilling holes and driving screws. It saves time compared to manual screwdrivers and is crucial for assembling wooden pieces or attaching hardware. A good power drill comes with variable speeds and a range of drill bits that allow you to handle different types of wood, screws, and materials. When using a power drill effectively, it’s important to choose the right bit for the job, adjust the speed appropriately, and maintain control to avoid damaging the wood.
When drilling holes, start by selecting the appropriate drill bit size based on the task. For example, when creating pilot holes for screws, use a bit slightly smaller than the diameter of the screw. Pilot holes help prevent the wood from splitting and ensure screws go in straight. Once the bit is secured in the drill, set the drill to a low speed for more control, especially when working with softer wood. Begin drilling slowly to ensure accuracy, and gradually increase speed once the hole is established.
The clutch setting on your power drill is a critical feature when driving screws. It controls how much torque is applied, preventing overdriving the screw, which can strip the wood or damage the screw head. For softwoods, set the clutch to a lower setting, and for hardwoods, a higher setting is appropriate. When driving screws, start at a low speed, applying steady pressure, and let the drill do most of the work. This will help prevent the screw from slipping or going in at an angle.
Power drills also come with additional features such as reverse mode, which allows you to easily remove screws or back out drill bits when necessary. This function is particularly useful when making adjustments or disassembling parts of a project. To use a power drill safely, always ensure the bit is tightly secured, and hold the drill with both hands for greater control. Wearing safety goggles is also important to protect your eyes from wood shavings or debris. With practice, the power drill becomes an indispensable tool for any woodworking project, from drilling precise holes to assembling pieces quickly and efficiently.
4. Chisels
Chisels are fundamental tools in woodworking, particularly when it comes to shaping, carving, and fine-tuning joints. A good set of chisels allows you to remove small amounts of wood with precision, which is especially useful in tasks like creating mortises, trimming edges, or cleaning out joints. The effectiveness of a chisel relies heavily on how sharp the blade is, so regular sharpening is key to maintaining its performance. A sharp chisel produces cleaner cuts, reducing the likelihood of wood tear-out, and allows for better control over fine details.
There are various types of chisels, each suited for different tasks. The most common is the bench chisel, which is versatile and can be used for both rough and fine woodworking. For example, a bench chisel can help you pare down wood for fitting joints or remove excess wood from mortises. To use a chisel effectively, hold it with one hand on the handle and the other near the blade to guide it. Apply steady pressure as you push the chisel forward, keeping it at a slight angle to remove thin shavings of wood rather than large chunks, which could cause splintering.
A mortise chisel is specifically designed for cutting deep, square holes or mortises in wood, used in traditional joinery. The thick, robust blade can withstand heavy mallet blows, allowing you to chop out wood efficiently. When using a mortise chisel, start by outlining the area you want to remove. Hold the chisel vertically and use a mallet to drive it into the wood, then pry out the waste. This process requires patience, as it’s important to work slowly to ensure straight, clean edges and a precise fit for the tenon.
To ensure the best results with chisels, always keep them sharp. Using a dull chisel not only makes your work more difficult but also increases the risk of damaging the wood. Regularly sharpen chisels with a sharpening stone or honing guide to maintain their edge. Additionally, when working with chisels, it’s important to hold the wood securely with clamps to prevent it from shifting during the process. With practice, chisels become indispensable tools for adding intricate details and achieving precision in your woodworking projects.
 5. Clamps
Clamps are essential in woodworking, playing a crucial role in holding pieces of wood together while glue dries, keeping parts steady during cutting or assembly, and ensuring precise alignment during construction. Without clamps, it’s nearly impossible to achieve the tight, even pressure needed for strong joints or perfectly aligned pieces. Clamps come in various types and sizes, each suited to different tasks, and understanding which clamp to use and how to use it effectively can significantly improve your woodworking results.
One of the most versatile types is the bar clamp, which is ideal for holding larger pieces of wood in place, such as when assembling furniture or gluing boards together. Bar clamps feature a long, adjustable bar that provides plenty of reach and pressure for wide surfaces. To use them effectively, ensure the wood pieces are aligned properly, then place the clamps evenly across the surface to apply uniform pressure. Tighten the clamps just enough to hold the pieces together without over-tightening, as too much pressure can cause the wood to bow or warp.
C-clamps are another common type, often used for smaller projects or holding pieces in place while cutting or drilling. They are compact and sturdy, making them useful for applying focused pressure on a specific area. When using C-clamps, make sure to place padding, like a piece of scrap wood, between the clamp and your workpiece to prevent the clamp from leaving marks or dents on the wood. C-clamps are also great for securing your wood to a workbench when working with chisels or saws, providing stability and precision.
For gluing projects, pipe clamps are highly effective because they allow for a longer reach and adjustable length, perfect for clamping long boards together during panel glue-ups. To use pipe clamps, place them across your workpieces, ensuring even pressure along the entire length of the joint. Tighten the clamps gradually, checking frequently to ensure that the wood pieces remain aligned and don’t shift under pressure. Pipe clamps are particularly useful when working on large tabletops or frames, as they provide excellent holding strength.
The key to using clamps effectively is to distribute pressure evenly across your project. Always use multiple clamps, spaced out evenly, to prevent uneven pressure, which could lead to gaps in joints or misalignment. Additionally, keep an eye on the project while the clamps are in place, as glue can cause pieces to shift slightly. By mastering the use of different types of clamps, you’ll ensure that your woodworking projects come together smoothly, with strong, well-aligned joints that will stand the test of time.
6. Sanders
Sanders are indispensable tools in woodworking, essential for smoothing surfaces, removing rough spots, and preparing wood for finishing. While sanding by hand is sometimes necessary for small details or hard-to-reach areas, using a power sander significantly speeds up the process and ensures an even, professional finish. Sanders come in different types, each designed for specific tasks, and learning how to use them effectively can make a noticeable difference in the quality of your projects.
One of the most common types is the random orbital sander, which is ideal for general-purpose sanding. Its circular sanding pad moves in both a rotating and random pattern, helping to prevent swirl marks and creating a smooth, even surface. This tool is great for sanding large, flat areas, like tabletops or doors. To use a random orbital sander effectively, start with a coarse-grit sandpaper (like 80 or 100 grit) to remove rough areas, then switch to finer grits (such as 180 or 220) for finishing. Always sand with light pressure and move the sander in overlapping passes along the grain of the wood for the best results.
Another useful tool is the belt sander, which is more aggressive and designed for quickly removing material from large, flat surfaces. Belt sanders use a continuous loop of sandpaper stretched over two rollers, making them powerful for heavy-duty sanding tasks, such as leveling uneven boards or removing old finishes. When using a belt sander, apply it with caution, as it can remove too much material if not handled carefully. Keep the sander moving in smooth, even strokes to avoid gouging the wood, and always sand in the direction of the grain.
For detailed work or sanding in tight spaces, a detail sander or corner sander is highly effective. These tools have a triangular sanding pad that can reach into corners and along edges where larger sanders can’t fit. A detail sander is perfect for finishing trim work, sanding between spindles, or smoothing small, intricate parts of a project. To use it effectively, gently guide the sander along the area you’re working on, using fine-grit sandpaper for finishing. The key to success with detail sanding is patience—move slowly and let the sander do the work to achieve a clean, smooth result.
No matter which type of sander you use, always wear safety gear such as a dust mask and safety glasses, as sanding generates fine dust particles that can be harmful if inhaled or if they get into your eyes. Additionally, it’s important to check your sandpaper regularly and replace it when it becomes worn, as dull sandpaper can leave scratches or uneven surfaces. By using the right sander for each task and following proper sanding techniques, you can achieve a smooth, professional finish on any woodworking project.
7. Jigsaw
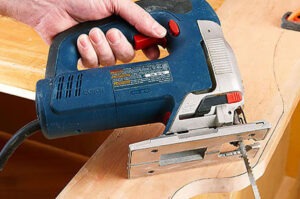 A jigsaw is one of the most versatile power tools in woodworking, allowing you to make curved cuts, intricate shapes, and even straight cuts in wood. Its flexible, handheld design and thin, vertical blade make it ideal for cutting irregular patterns or fitting into tight corners that larger saws can’t reach. A jigsaw is perfect for tasks like cutting out circles, making rounded edges on furniture, or crafting unique designs in wood. Understanding how to use a jigsaw effectively can open up many creative possibilities in your woodworking projects.
One of the key strengths of a jigsaw is its ability to cut curves and shapes with precision. To achieve clean curves, it’s important to start by using the right blade. Jigsaw blades come in various sizes and tooth configurations, with fine-toothed blades designed for smoother cuts and coarse-toothed blades for faster, rougher cuts. For intricate or tight curves, a narrow blade with more teeth per inch (TPI) is ideal, as it allows for better maneuverability and control. When cutting curves, guide the saw slowly and steadily, letting the blade do the work without forcing it through the wood, as rushing can cause splintering or misaligned cuts.
Jigsaws are also excellent for making plunge cuts, which allow you to start a cut in the middle of the wood without needing an entry point from the edge. This is particularly useful when cutting out holes for sinks, vents, or electrical outlets. To make a plunge cut, tilt the jigsaw forward so the front of the shoe (the flat base of the saw) rests on the wood, with the blade off the surface. Start the saw and slowly lower the blade into the wood, then guide it along your desired cut line. This technique requires practice but can save a lot of time when working on interior cuts.
Another important feature of jigsaws is their orbital setting, which controls how aggressively the blade moves. In the standard straight-cut mode, the blade moves up and down vertically, which is ideal for fine or detailed work. In the orbital mode, the blade moves in an elliptical motion, making it better for faster, rougher cuts, such as when cutting thicker or softer woods. For smooth, detailed cuts, keep the orbital setting on low or off, but for speedier cuts on less precise work, you can increase the orbital setting for faster material removal.
When using a jigsaw, always ensure that the wood is clamped securely to prevent it from shifting while you cut, as any movement can lead to mistakes or uneven cuts. Additionally, it’s important to use the correct speed setting for your material; slower speeds are better for hardwoods, while faster speeds can be used on softwoods and plywood. By selecting the right blade, adjusting the speed and orbital settings, and practicing proper technique, a jigsaw can become an incredibly powerful tool for both functional and decorative woodworking projects.
8. Wood Glue
Wood glue is a vital adhesive in woodworking, known for its ability to create strong, lasting bonds between pieces of wood. Whether you’re building furniture, repairing joints, or crafting smaller projects, wood glue ensures that your pieces stay securely attached, often providing a bond stronger than the wood itself. There are different types of wood glue, but the most commonly used is PVA (polyvinyl acetate) glue, often referred to as carpenter’s glue. To use wood glue effectively, it’s important to choose the right type of glue, apply it correctly, and ensure proper clamping during the drying process.
One of the key factors in using wood glue effectively is surface preparation. Before applying glue, make sure that the surfaces you are bonding are clean, smooth, and properly aligned. Wood glue works best when applied to flat, close-fitting surfaces, as it relies on surface contact to form a strong bond. Sanding the surfaces lightly to remove any dirt or rough spots can improve the glue’s grip. Also, ensure the wood is dry, as moisture can weaken the bond by preventing the glue from penetrating the wood fibers.
When applying wood glue, a thin, even layer is all that’s needed to achieve a strong bond. Using too much glue can cause excessive squeeze-out, making a mess and requiring more cleanup later. A good technique is to spread the glue evenly using a brush, roller, or your finger, covering the entire surface while avoiding excess. Once the glue is applied, join the wood pieces immediately and press them together. Any gaps or uneven pressure can weaken the bond, so ensure that the pieces are perfectly aligned before moving on to the next step.
After the pieces are glued together, clamping is crucial to ensure a tight, secure bond. Clamps apply consistent pressure, holding the pieces in place while the glue dries. Depending on the size and type of project, bar clamps, pipe clamps, or C-clamps may be used. Space the clamps evenly along the joint, applying enough pressure to close any gaps, but not so much that it squeezes out all the glue. Most wood glues require several hours to dry, but leaving the project clamped for at least 24 hours ensures maximum strength. Once dried, any excess glue that squeezed out can be easily scraped off or sanded for a clean finish.
Using wood glue properly ensures strong, durable joints in your woodworking projects. Whether you’re working on furniture or smaller crafts, mastering the application of wood glue and understanding the importance of clamping and drying times will lead to better results and longer-lasting projects.
9. Workbench
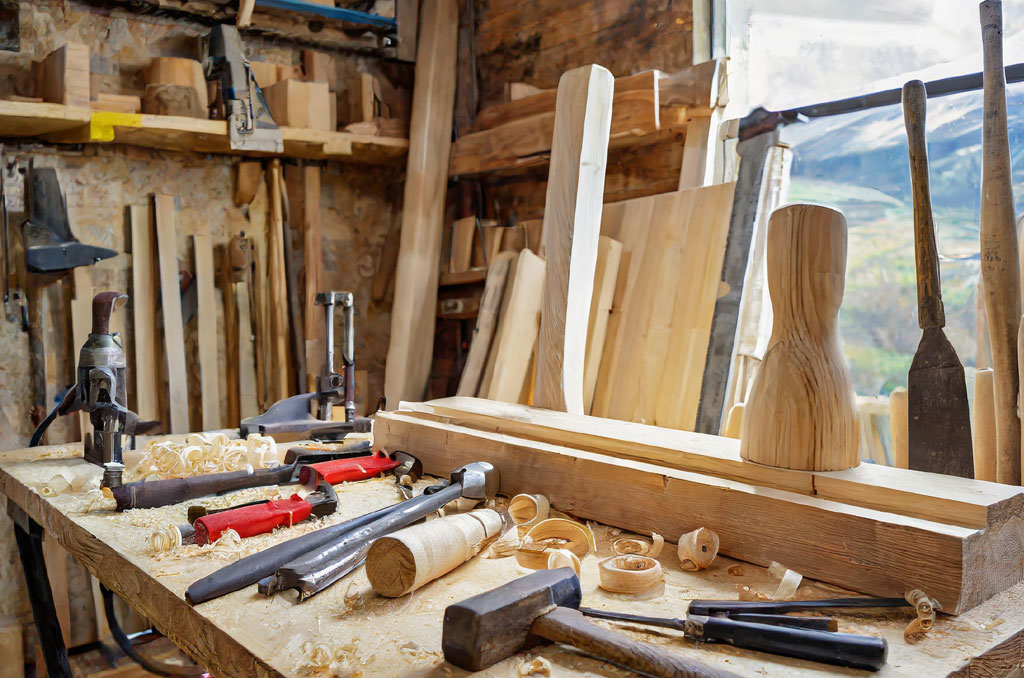
A workbench is one of the most essential tools in any woodworking shop, serving as the primary workspace for a variety of tasks, from cutting and assembling to sanding and finishing. A sturdy, well-designed workbench provides a stable surface that supports your projects, making it easier to work accurately and efficiently. Whether you’re a beginner or an experienced woodworker, having a good workbench tailored to your needs can greatly enhance your productivity and the quality of your work.
When choosing a workbench, consider the size and height to ensure it suits your specific projects. A standard height for a workbench is usually around 34 to 36 inches, allowing you to work comfortably while standing. If you frequently work on large projects, opt for a larger surface area to accommodate your materials. Additionally, consider a bench that has a solid surface, such as hardwood or a composite material, as this will resist warping and wear over time. A heavy, sturdy bench is less likely to shake or tip during use, providing the stability needed for precise cuts and assembly.
One of the key features to look for in a workbench is built-in clamping mechanisms or vices. These tools allow you to secure your workpieces in place while you cut, sand, or assemble, which is essential for achieving accurate results. A front or end vise can be particularly useful for holding boards securely while you work on edges or cut to size. Additionally, you might want to consider using bench dogs—small pegs that fit into holes on the workbench surface— which provide extra clamping points and help stabilize materials during operations.
To use a workbench effectively, keep your workspace organized and free of clutter. Designate specific areas for different tasks, such as cutting, sanding, and assembly, to streamline your workflow. Use tool storage solutions like drawers or wall-mounted racks to keep your tools within easy reach, minimizing the time spent searching for what you need. Finally, remember to maintain your workbench; keeping the surface clean and occasionally sanding it down will ensure a smooth, level working area, ultimately enhancing your woodworking experience. A well-equipped workbench will serve as the heart of your workshop, making it easier to tackle a wide range of projects with confidence and precision.
10. Safety Gear
 Safety gear is an essential component of any woodworking toolkit, helping to protect you from the various hazards associated with working with power tools and sharp materials. Woodworking can produce flying debris, dust, loud noises, and sharp edges, all of which pose potential risks to your health and safety. Investing in the right safety gear is crucial to ensure a safe working environment and to minimize the risk of injury while maximizing your ability to focus on your projects.
One of the most important pieces of safety gear is eye protection. Safety goggles or glasses protect your eyes from flying wood chips, sawdust, and other debris that can cause serious eye injuries. Look for goggles that fit snugly and provide a clear, unobstructed view. Some models even feature anti-fog technology, which can be especially helpful when working in humid environments or during extended use. For those who wear prescription glasses, safety glasses that fit over your regular glasses are available, ensuring your vision remains protected without sacrificing comfort.
Another crucial piece of safety equipment is hearing protection. Power tools can generate loud noise levels that may lead to hearing damage over time. Using earplugs or earmuffs can help reduce the risk of hearing loss. When selecting hearing protection, consider options that are comfortable to wear for extended periods, especially if you often work in a noisy environment. Some earmuffs even come with built-in communication devices or sound-canceling features, allowing you to hear important sounds while still protecting your ears from harmful noise levels.
Dust masks or respirators are also essential for maintaining respiratory health while woodworking. Wood dust can be hazardous when inhaled, leading to respiratory problems and long-term health issues. A basic dust mask can provide some level of protection, but for fine dust particles or when using certain materials, a respirator with a higher filtration rating is recommended. Make sure the mask fits properly to create an effective seal, and replace it regularly, especially if it becomes clogged or damaged. Additionally, consider using a dust collection system or a shop vacuum to help minimize dust in your workspace, complementing your safety gear.
In summary, prioritizing safety gear in your woodworking projects is not just a precaution; it’s a fundamental aspect of responsible craftsmanship. By consistently wearing eye protection, hearing protection, and respiratory gear, you can significantly reduce the risk of injury and ensure a safer working environment. This allows you to focus on your creativity and skills, leading to more enjoyable and productive woodworking experiences.
In Conclusion
Equipping yourself with essential woodworking tools is crucial for any woodworker, whether you’re a beginner or an experienced craftsman. Each tool serves a unique purpose, from measuring accurately with tapes and squares to achieving precise cuts with jigsaws and hand saws. Understanding how to use these tools effectively enhances your craftsmanship and boosts your confidence in tackling various woodworking projects. With the right tools at your disposal, you can transform your ideas into tangible creations, whether it’s a simple shelf or an intricate piece of furniture.
Moreover, safety gear is a fundamental aspect of woodworking that should never be overlooked. Protecting yourself with proper eye, ear, and respiratory protection creates a safe work environment where you can focus on your craft without the distraction of potential hazards. By prioritizing safety and organization in your workspace, you not only enhance your woodworking experience but also prolong your ability to work comfortably and efficiently over the years.
Ultimately, woodworking is not just about the tools you use but also about the knowledge and skills you develop along the way. Embrace the learning process, experiment with different techniques, and continuously refine your craft. With a solid foundation of essential tools and a commitment to safety, you can enjoy the rewarding journey of woodworking, creating beautiful and functional pieces that reflect your personal style and dedication to the art. Happy woodworking!