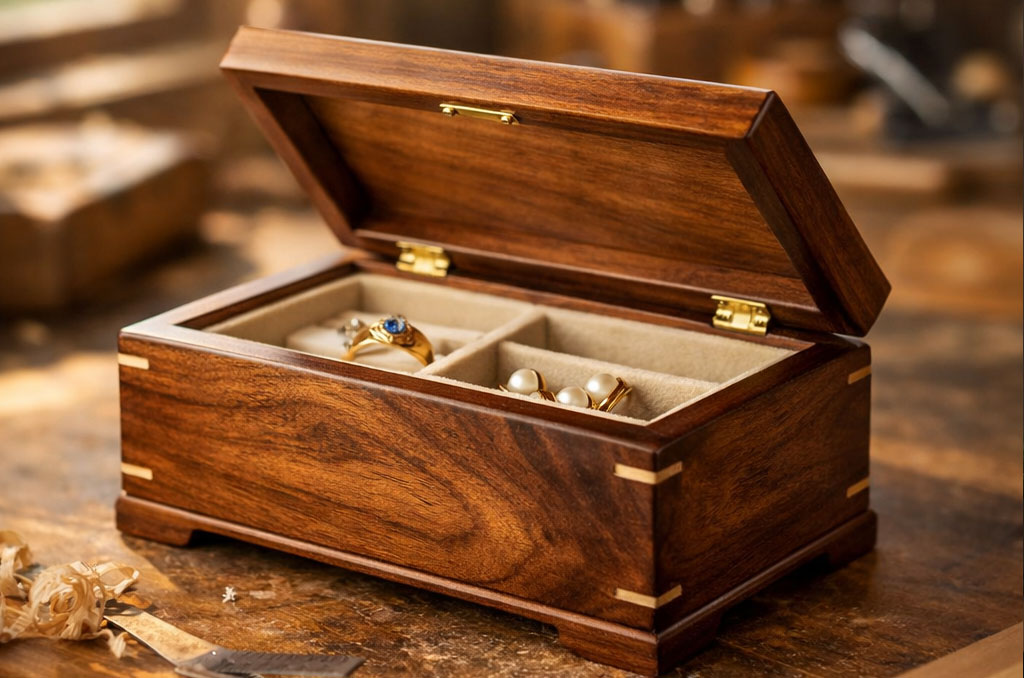
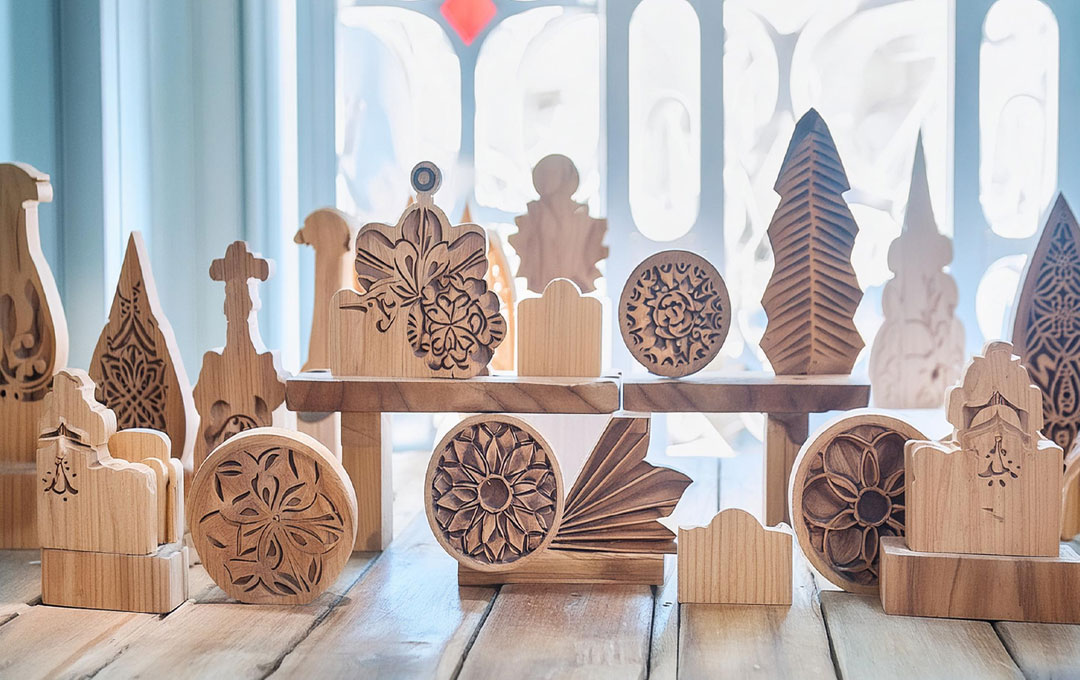
25 Profitable Pallet Wood Projects to Make and Sell
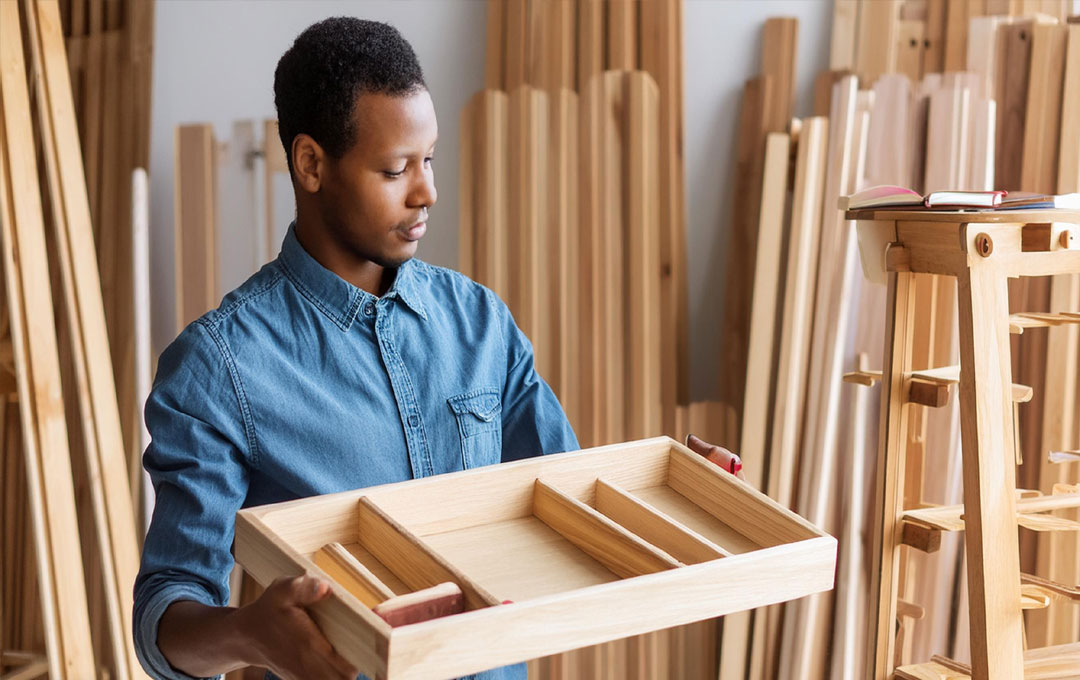
Pallet wood is an excellent and cost-effective material for crafting beautiful and functional projects. Whether you’re a seasoned woodworker or a DIY enthusiast, creating pallet wood projects can be a rewarding and profitable venture.
In this article, we will introduce you to 25 fantastic pallet wood projects that are not only fun to make but also have the potential to sell quickly.
You can visit any of the marketplaces to sell or buy this creative pallet woodwork. you can also use one of our best-selling woodworking plans to help you build a more creative and standout masterpiece of any pallet woodwork you want to design. So, grab your tools, and let’s get started!
Rustic Wall Shelves:
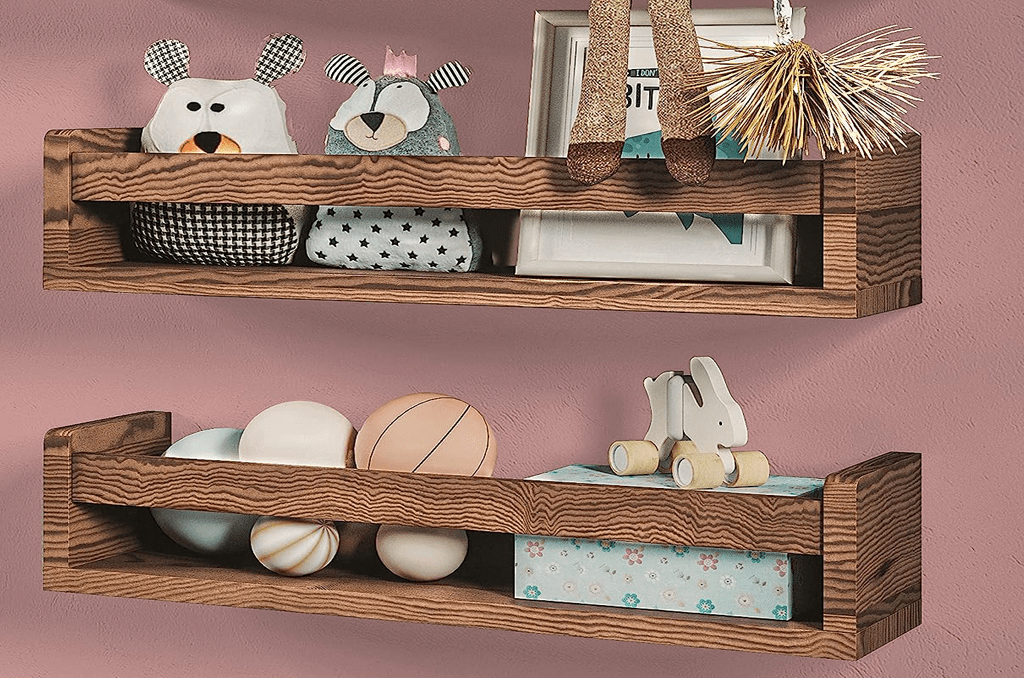 Craft stylish wall shelves using pallet wood, perfect for displaying decor and organizing items. you can study this step-by-step approach to get started.
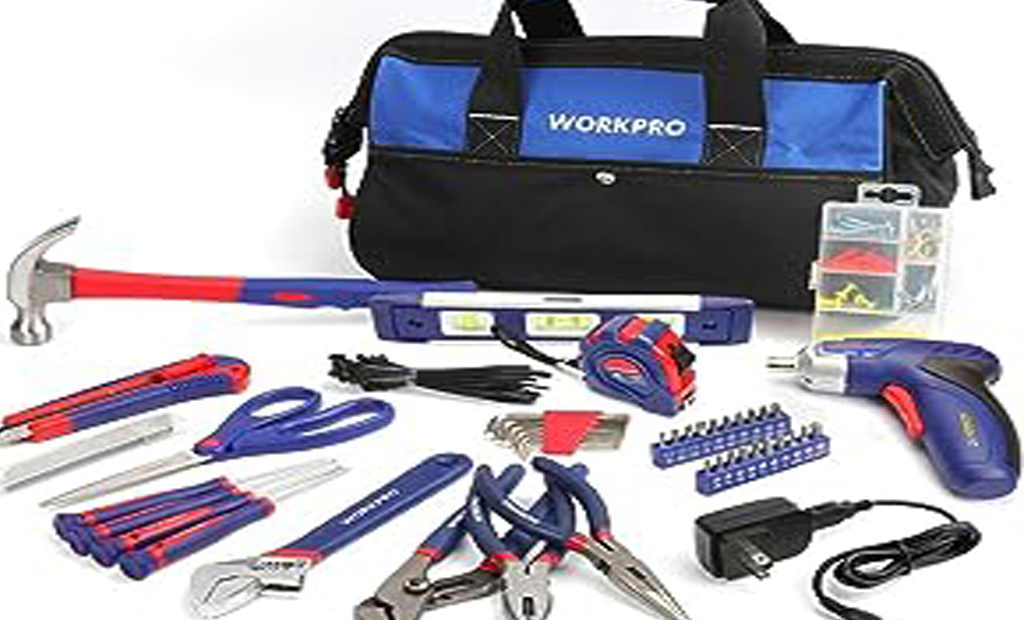
Step 1: Gather the Materials – pallet wood, measuring tape, saw, sandpaper, screws, drill, and wood stain (optional).
Step 2: Disassemble the Pallet – carefully remove the boards from the pallet using a pry bar or a crowbar.
Step 3: Measure and Cut – measure the desired length for the shelves and cut the pallet boards accordingly.
Step 4: Sand the Wood – smooth out the rough edges and surfaces with sandpaper.
Step 5: Assemble the Shelves – arrange the boards as desired and secure them together with screws.
Step 6: Optional Staining – if desired, apply wood stain to enhance the rustic look.
Step 7: Mount the Shelves – use screws or wall brackets to mount the shelves securely on the wall.
Pallet Picture Frames:
Transform pallet wood into unique picture frames, adding a touch of rustic charm to treasured memories by using the step-by-step method below.
Step 1: Disassemble the Pallet – carefully remove the pallet boards using a pry bar or crowbar.
Step 2: Measure and Cut – measure the dimensions of the picture frame you want and cut the boards accordingly.
Step 3: Assemble the Frame – arrange the boards to form the frame and secure them together using nails or screws.
Step 4: Sand the Frame – smooth out the edges and surfaces of the frame with sandpaper.
Step 5: Insert the Picture – use a clear acrylic sheet or glass to cover the picture and secure it at the back of the frame.
Step 6: Add a Backing – attach a piece of plywood or cardboard at the back of the frame to hold the picture in place.
Step 7: Attach Hanging Hardware – add a sawtooth hanger or D-rings to the back of the frame for easy hanging.
Wooden Planters:
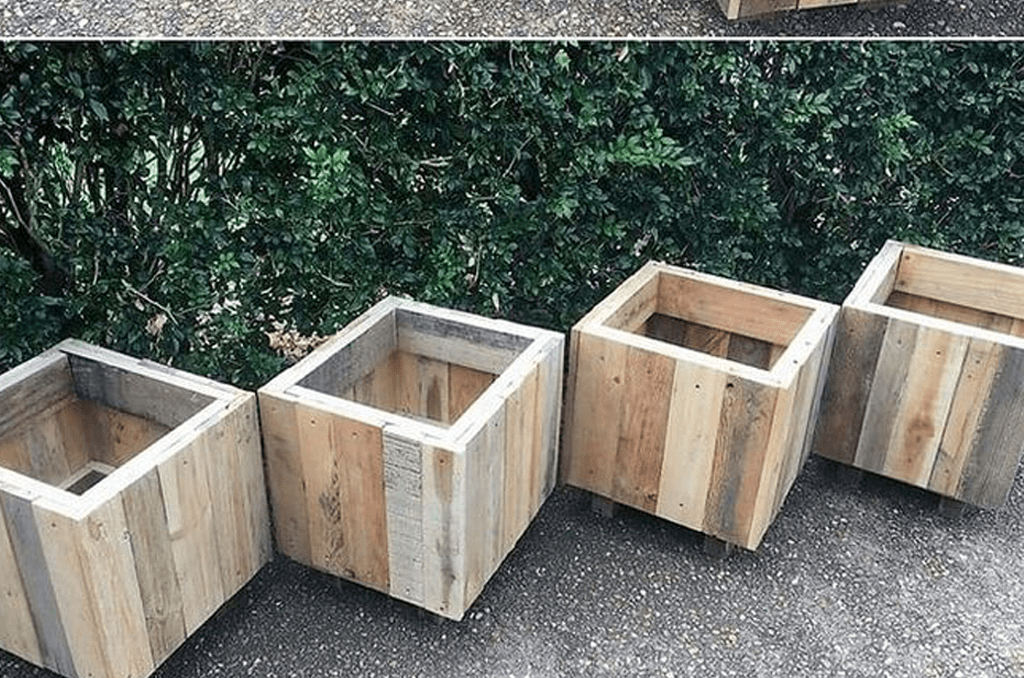 Design and build garden planters using pallet wood, appealing to gardening enthusiasts. Start by studying these simple steps below.
Step 1: Disassemble the Pallet – carefully remove the boards from the pallet using a pry bar or crowbar.
Step 2: Measure and Cut – determine the size of the planter and cut the boards accordingly.
Step 3: Assemble the Planter – arrange the boards to form the planter box and secure them together using nails or screws.
Step 4: Create Drainage Holes – drill several small drainage holes in the bottom of the planter for proper water drainage.
Step 5: Sand the Planter – smooth out the rough surfaces with sandpaper.
Step 6: Apply a Finish – apply a wood sealer or outdoor paint to protect the planter from weather elements.
Step 7: Optional – Add legs or casters to elevate the planter or make it easier to move.
Pallet Coasters:
Create coasters with pallet wood and sell them in sets; they make great gifts and add character to any table setting.
Step 1: Disassemble the Pallet – carefully remove the pallet boards using a pry bar or crowbar.
Step 2: Measure and Cut – measure the desired size of the coasters and cut the boards accordingly.
Step 3: Sand the Coasters – smooth out the edges and surfaces of the coasters with sandpaper.
Step 4: Optional – Stain or Paint – apply wood stain or paint to enhance the appearance of the coasters.
Step 5: Seal the Coasters – apply a clear wood sealer or varnish to protect the coasters from moisture.
Step 6: Add Cork or Felt – attach cork or felt pads to the bottom of the coasters to prevent scratches on surfaces.
Pallet Wine Rack:
Craft a wine rack from pallet wood, catering to wine enthusiasts who appreciate rustic decor.
Step 1: Disassemble the Pallet – carefully remove the pallet boards using a pry bar or crowbar.
Step 2: Measure and Cut – determine the size of the wine rack and cut the boards accordingly.
Step 3: Assemble the Wine Rack – arrange the boards to form the wine rack and secure them together using nails or screws.
Step 4: Optional – Sand the Wine Rack – smooth out the surfaces with sandpaper for a polished look.
Step 5: Stain or Paint – apply wood stain or paint to enhance the rustic appearance.
Step 6: Mount the Wine Rack – use screws or wall brackets to mount the wine rack securely on the wall.
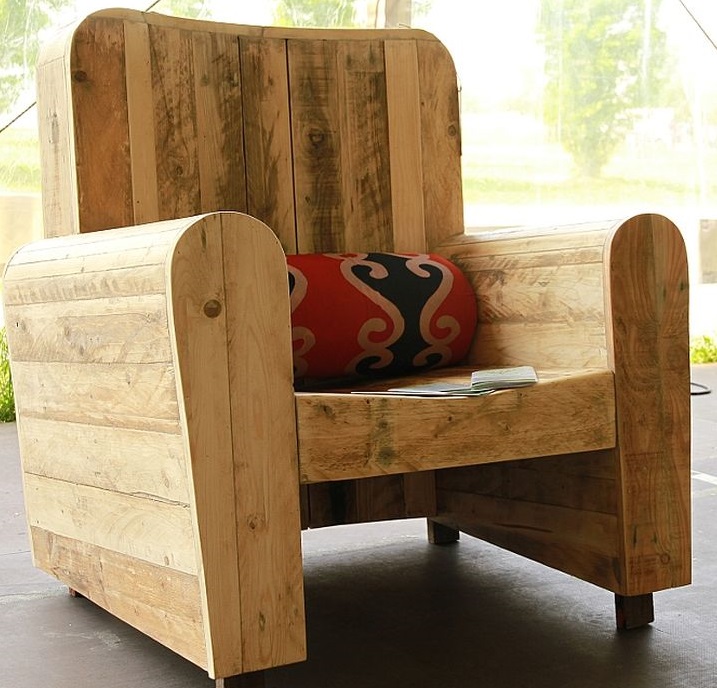
Pallet Coffee Table:
 Construct a trendy coffee table that will be the centerpiece of any living room.
Step 1: Disassemble the Pallet – carefully remove the pallet boards using a pry bar or crowbar.
Step 2: Measure and Cut – determine the size of the coffee table and cut the boards accordingly.
Step 3: Assemble the Tabletop – arrange the boards to form the tabletop and secure them together using nails or screws.
Step 4: Create the Legs – cut and assemble four sturdy legs for the table.
Step 5: Attach the Legs – securely attach the legs to the tabletop using screws.
Step 6: Optional – Sand and Stain – and the coffee table and apply wood stain or paint for a smooth and finished look.
Step 7: Optional – Add a lower shelf – attach another set of boards beneath the tabletop to create a shelf for additional storage.
Pallet Serving Tray:
Handcraft serving trays from pallet wood, ideal for entertaining and serving refreshments.
Step 1: Disassemble the Pallet – carefully remove the pallet boards using a pry bar or crowbar.
Step 2: Measure and Cut – determine the size of the serving tray and cut the boards accordingly.
Step 3: Assemble the Tray – arrange the boards to form the base of the tray and secure them together using nails or screws.
Step 4: Create Handles – cut two smaller pieces of pallet wood and attach them as handles to the sides of the tray.
Step 5: Optional – Sand and Stain – sand the tray and apply wood stain or paint for a polished look.
Step 6: Optional – Add a layer of clear epoxy – apply a layer of clear epoxy to protect the tray and give it a glossy finish.
Wooden Key Holders:
Design and make practical and decorative key holders, perfect for home organization.
Step 1: Disassemble the Pallet – carefully remove the pallet boards using a pry bar or crowbar.
Step 2: Measure and Cut – determine the size of the key holder and cut the boards accordingly.
Step 3: Assemble the Key Holder – arrange the boards to form the key holder and secure them together using nails or screws.
Step 4: Add Hooks – screw small hooks into the bottom of the key holder to hold keys.
Step 5: Optional – Sand and Stain – sand the key holder and apply wood stain or paint for a polished look.
Step 6: Mount the Key Holder – use screws or wall brackets to mount the key holder securely on the wall.
Pallet Headboard:
Create unique headboards for beds, providing a rustic and cozy ambiance in bedrooms.
Step 1: Disassemble the Pallet – carefully remove the pallet boards using a pry bar or crowbar.
Step 2: Measure and Cut – determine the size of the headboard and cut the boards accordingly.
Step 3: Assemble the Headboard – arrange the boards to form the headboard and secure them together using nails or screws.
Step 4: Optional – Sand and Stain – sand the headboard and apply wood stain or paint for a polished look.
Step 5: Attach the Headboard – secure the headboard to the bed frame or wall using screws or brackets.
Pallet Laptop Stand:
Make laptop stands from pallet wood, catering to the growing remote working population.
Step 1: Disassemble the Pallet – carefully remove the pallet boards using a pry bar or crowbar.
Step 2: Measure and Cut – determine the size of the laptop stand and cut the boards accordingly.
Step 3: Assemble the Stand – arrange the boards to form the laptop stand and secure them together using nails or screws.
Step 4: Optional – Sand and Stain – sand the laptop stand and apply wood stain or paint for a polished look.
Step 5: Optional – Add support – attach additional boards as support to the back of the laptop stand.
Step 6: Optional – Add adjustable legs – attach adjustable legs to the bottom of the laptop stand to customize the height.
Pallet Wall Art:
 Turn pallet wood into artistic wall decor, appealing to those looking for one-of-a-kind pieces.
Step 1: Disassemble the Pallet – carefully remove the pallet boards using a pry bar or crowbar.
Step 2: Measure and Cut – determine the size and shape of the wall art and cut the boards accordingly.
Step 3: Design the Artwork – plan and design your artwork on the pallet boards.
Step 4: Trace the Design – use a pencil or chalk to trace the design onto the boards.
Step 5: Paint the Artwork – use acrylic paint or wood stain to fill in the traced design.
Step 6: Optional – Add other embellishments – use stencils, wood carvings, or other materials to add depth and details.
Step 7: Optional – Seal the Artwork – apply a clear wood sealer or varnish to protect the artwork.
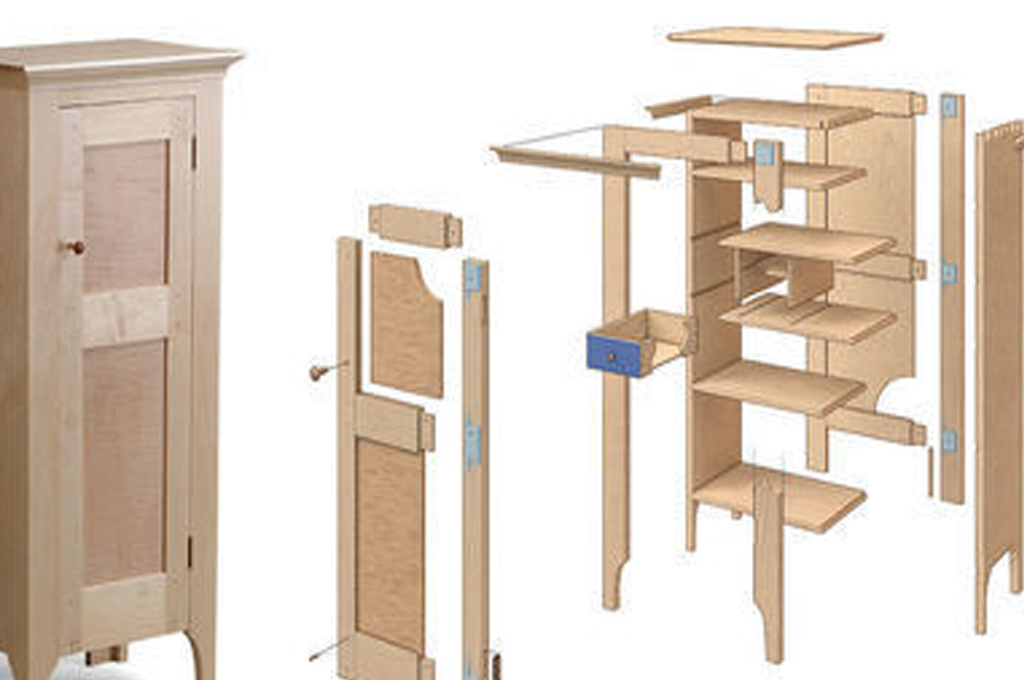
Pallet Bookshelf:
Craft bookshelves from pallet wood, ideal for book lovers and organizing spaces.
Step 1: Disassemble the Pallet – carefully remove the pallet boards using a pry bar or crowbar.
Step 2: Measure and Cut – determine the size of the bookshelf and cut the boards accordingly.
Step 3: Assemble the Shelves – arrange the boards to form the shelves and secure them together using nails or screws.
Step 4: Add Support – attach additional boards as support for the shelves to hold books and other items.
Step 5: Optional – Sand and Stain – sand the bookshelf and apply wood stain or paint for a polished look.
Step 6: Mount the Bookshelf – use screws or wall brackets to mount the bookshelf securely on the wall.
Wooden Phone Dock:
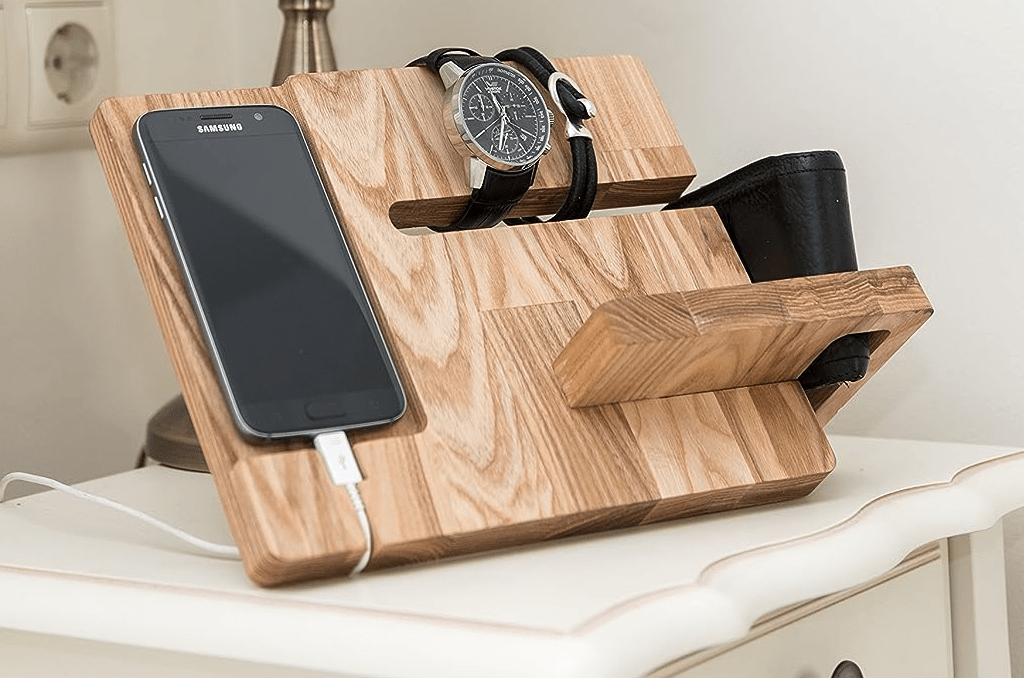 Build phone docks with pallet wood, providing a stylish charging station for smartphones.
Step 1: Disassemble the Pallet – carefully remove the pallet boards using a pry bar or crowbar.
Step 2: Measure and Cut – determine the size of the phone dock and cut the boards accordingly.
Step 3: Assemble the Dock – arrange the boards to form the phone dock and secure them together using nails or screws.
Step 4: Create a Slot – use a saw or router to create a slot in the dock to hold the phone.
Step 5: Optional – Sand and Stain – sand the phone dock and apply wood stain or paint for a polished look.
Step 6: Optional – Add a charging port – create a hole or slot to accommodate a charging cable.
Pallet Coat Rack:
Design coat racks using pallet wood, providing practical storage solutions for entryways.
Step 1: Disassemble the Pallet – carefully remove the pallet boards using a pry bar or crowbar.
Step 2: Measure and Cut – determine the size of the coat rack and cut the boards accordingly.
Step 3: Assemble the Rack – arrange the boards to form the coat rack and secure them together using nails or screws.
Step 4: Add Hooks – screw sturdy hooks along the bottom of the coat rack to hold coats and other items.
Step 5: Optional – Sand and Stain – sand the coat rack and apply wood stain or paint for a polished look.
Step 6: Mount the Coat Rack – use screws or wall brackets to mount the coat rack securely on the wall.
Pallet Pet Bed:
Create cozy pet beds from pallet wood, catering to pet owners who want eco-friendly options.
Step 1: Disassemble the Pallet – carefully remove the pallet boards using a pry bar or crowbar.
Step 2: Measure and Cut – determine the size of the pet bed and cut the boards accordingly.
Step 3: Assemble the Bed – arrange the boards to form the pet bed and secure them together using nails or screws.
Step 4: Optional – Add a cushion – place a comfortable cushion or pet mattress inside the bed for your furry friend.
Step 5: Optional – Sand and Stain – sand the pet bed and apply wood stain or paint for a polished look.
Step 6: Optional – Add legs or casters – attach legs or casters to elevate the pet bed or make it easier to move.
Rustic Pallet Clock:
Make unique and rustic clocks, combining functionality and aesthetics.
Step 1: Disassemble the Pallet – carefully remove the pallet boards using a pry bar or crowbar.
Step 2: Measure and Cut – determine the size and shape of the clock and cut the boards accordingly.
Step 3: Create the Clock Face – use a circular saw or jigsaw to cut a circular shape from the boards.
Step 4: Optional – Sand and Stain – sand the clock face and apply wood stain or paint for a polished look.
Step 5: Add Clock Mechanism – purchase a clock mechanism and follow the instructions to install it on the clock face.
Step 6: Add Clock Hands – attach the clock hands to the clock mechanism following the manufacturer’s instructions.
Step 7: Optional – Add Numbers – paint or use decals to add numbers to the clock face.
Pallet Wine Holder:
Construct wine bottle holders from pallet wood, appealing to wine collectors.
Step 1: Disassemble the Pallet – carefully remove the pallet boards using a pry bar or crowbar.
Step 2: Measure and Cut – determine the size of the wine holder and cut the boards accordingly.
Step 3: Assemble the Holder – arrange the boards to form the wine holder and secure them together using nails or screws.
Step 4: Create the Wine Slots – cut notches or slots into the boards to hold the wine bottles securely.
Step 5: Optional – Sand and Stain – sand the wine holder and apply wood stain or paint for a polished look.
Step 6: Mount the Wine Holder – use screws or wall brackets to mount the wine holder securely on the wall.
Wooden Wall Hooks:
Craft decorative wall hooks using pallet wood, adding character to any room.
Step 1: Disassemble the Pallet – carefully remove the pallet boards using a pry bar or crowbar.
Step 2: Measure and Cut – determine the size of the wall hooks and cut the boards accordingly.
Step 3: Assemble the Hooks – arrange the boards to form the wall hooks and secure them together using nails or screws.
Step 4: Add Hooks – screw sturdy hooks along the bottom of the wall hooks to hold items.
Step 5: Optional – Sand and Stain – sand the wall hooks and apply wood stain or paint for a polished look.
Step 6: Mount the Wall Hooks – use screws or wall brackets to mount the wall hooks securely on the wall.
Pallet Jewelry Organizer:
Design jewelry organizers that provide a stylish and organized way to store accessories.
Step 1: Disassemble the Pallet – carefully remove the pallet boards using a pry bar or crowbar.
Step 2: Measure and Cut – determine the size of the jewelry organizer and cut the boards accordingly.
Step 3: Assemble the Organizer – arrange the boards to form the jewelry organizer and secure them together using nails or screws.
Step 4: Add Hooks and Hangers – screw small hooks and hangers into the boards to hold jewelry and accessories.
Step 5: Optional – Sand and Stain – sand the jewelry organizer and apply wood stain or paint for a polished look.
Step 6: Mount the Organizer – use screws or wall brackets to mount the jewelry organizer securely on the wall.
Pallet Floating Shelves:
Create floating shelves from pallet wood, ideal for small spaces and minimalist decor.
Step 1: Disassemble the Pallet – carefully remove the pallet boards using a pry bar or crowbar.
Step 2: Measure and Cut – determine the size of the floating shelves and cut the boards accordingly.
Step 3: Assemble the Shelves – arrange the boards to form the floating shelves and secure them together using nails or screws.
Step 4: Optional – Sand and Stain – sand the floating shelves and apply wood stain or paint for a polished look.
Step 5: Mount the Shelves – use hidden shelf brackets or install wall brackets to mount the shelves securely on the wall.
Wooden Tablet Stand:
Make tablet stands from pallet wood, catering to tech-savvy consumers.
Step 1: Disassemble the Pallet – carefully remove the pallet boards using a pry bar or crowbar.
Step 2: Measure and Cut – determine the size of the tablet stand and cut the boards accordingly.
Step 3: Assemble the Stand – arrange the boards to form the tablet stand and secure them together using nails or screws.
Step 4: Create a Slot – use a saw or router to create a slot in the stand to hold the tablet.
Step 5: Optional – Sand and Stain – sand the tablet stand and apply wood stain or paint for a polished look.
Step 6: Optional – Add a charging port – create a hole or slot to accommodate a charging cable.
Pallet Garden Bench:
Craft garden benches using pallet wood, providing a relaxing spot for outdoor enthusiasts.
Step 1: Disassemble the Pallet – carefully remove the pallet boards using a pry bar or crowbar.
Step 2: Measure and Cut – determine the size of the garden bench and cut the boards accordingly.
Step 3: Assemble the Bench Seat – arrange the boards to form the bench seat and secure them together using nails or screws.
Step 4: Create Legs – cut and assemble sturdy legs for the bench.
Step 5: Attach the Legs – securely attach the legs to the bench seat using screws.
Step 6: Optional – Sand and Stain – sand the garden bench and apply wood stain or paint for a polished look.
Step 7: Optional – Add a backrest – attach additional boards to the back of the bench to create a backrest.
Pallet Magazine Rack:
Design magazine racks from pallet wood, catering to those who appreciate practical storage.
Step 1: Disassemble the Pallet – carefully remove the pallet boards using a pry bar or crowbar.
Step 2: Measure and Cut – determine the size of the magazine rack and cut the boards accordingly.
Step 3: Assemble the Rack – arrange the boards to form the magazine rack and secure them together using nails or screws.
Step 4: Add Dividers – attach small boards vertically between the larger boards to create slots for magazines.
Step 5: Optional – Sand and Stain – sand the magazine rack and apply wood stain or paint for a polished look.
Step 6: Mount the Rack – use screws or wall brackets to mount the magazine rack securely on the wall.
Wooden Candle Holders:
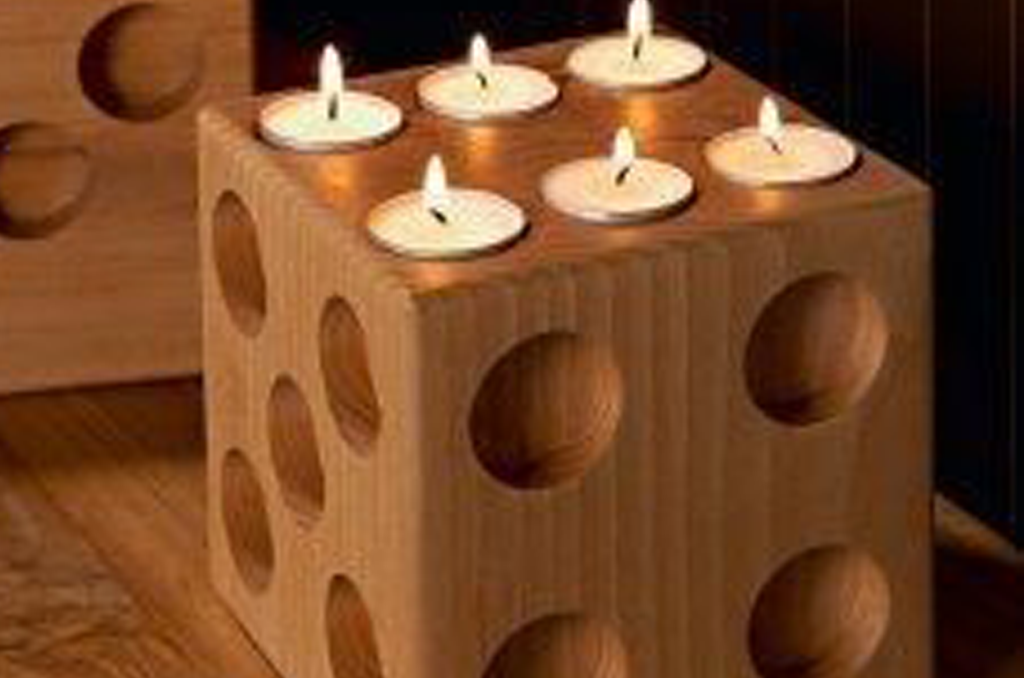 Create candle holders using pallet wood, offering a warm and rustic ambiance.
Step 1: Disassemble the Pallet – carefully remove the pallet boards using a pry bar or crowbar.
Step 2: Measure and Cut – determine the size of the candle holders and cut the boards accordingly.
Step 3: Assemble the Holders – arrange the boards to form the candle holders and secure them together using nails or screws.
Step 4: Optional – Sand and Stain – sand the candle holders and apply wood stain or paint for a polished look.
Step 5: Add Candle Inserts – use a drill to create holes in the top of the holders to hold candles securely.
Pallet Wall Hangers:
Make wall hangers from pallet wood, ideal for organizing hats, scarves, and bags.
Step 1: Disassemble the Pallet – carefully remove the pallet boards using a pry bar or crowbar.
Step 2: Measure and Cut – determine the size of the wall hangers and cut the boards accordingly.
Step 3: Assemble the Hangers – arrange the boards to form the wall hangers and secure them together using nails or screws.
Step 4: Add Hooks – screw sturdy hooks along the bottom of the wall hangers to hold hats, scarves, and bags.
Step 5: Optional – Sand and Stain – sand the wall hangers and apply wood stain or paint for a polished look.
Step 6: Mount the Hangers – use screws or wall brackets to mount the wall hangers securely on the wall.
To wrap it up:
Remember, safety should always be a priority when working with tools and wood. Wear appropriate safety gear, such as goggles and gloves, and follow the manufacturer’s instructions for any tools and materials used.
Additionally, take care to properly disassemble and handle pallets to avoid splinters or injuries. Pallet wood projects present an excellent opportunity for crafting and selling unique, rustic, and environmentally friendly creations.
As you venture into making these 25 pallet wood projects, ensure that you use high-quality pallet wood and incorporate your creative flair into each piece.
Promote your items through online marketplaces, craft fairs, and social media platforms to reach potential customers. With dedication, craftsmanship, and a bit of marketing, you can turn your passion for pallet wood projects into a profitable business venture. Happy crafting and selling!