
A Beginner’s Guide to Woodworking: From Basics to Advanced Projects

Woodworking is an ancient craft that has captivated artisans and hobbyists for centuries. From crafting everyday items to creating intricate works of art, woodworking offers a unique blend of creativity, precision, and satisfaction. Whether you’re a complete beginner eager to learn the basics or an experienced woodworker looking for new challenges, there’s a project suited to every skill level.
In this detailed guide, we’ll explore step-by-step tutorials for Teds Woodworking projects designed specifically for beginners, intermediate craftsmen, and advanced woodworkers. We’ll delve into the tools, materials, techniques, and safety measures necessary to embark on your woodworking journey successfully.
From crafting a simple wooden serving tray to tackling more complex projects like an Adirondack chair or a roll-top desk, each level presents opportunities for learning and growth. Along the way, we’ll provide clear instructions, accompanied by photos and videos where possible, to ensure a seamless and enjoyable learning experience.
Whether you’re drawn to the practicality of building furniture for your home or the joy of creating handcrafted gifts for loved ones, woodworking offers a world of possibilities. So, grab your tools, don your safety gear, and let’s dive into the fascinating world of Teds Woodworking, where craftsmanship meets creativity in every saw cut and wood joint.
| Get Access to Woodworking Guides & Videos |
A Breakdown Of The Beginner-Level Woodworking Projects:
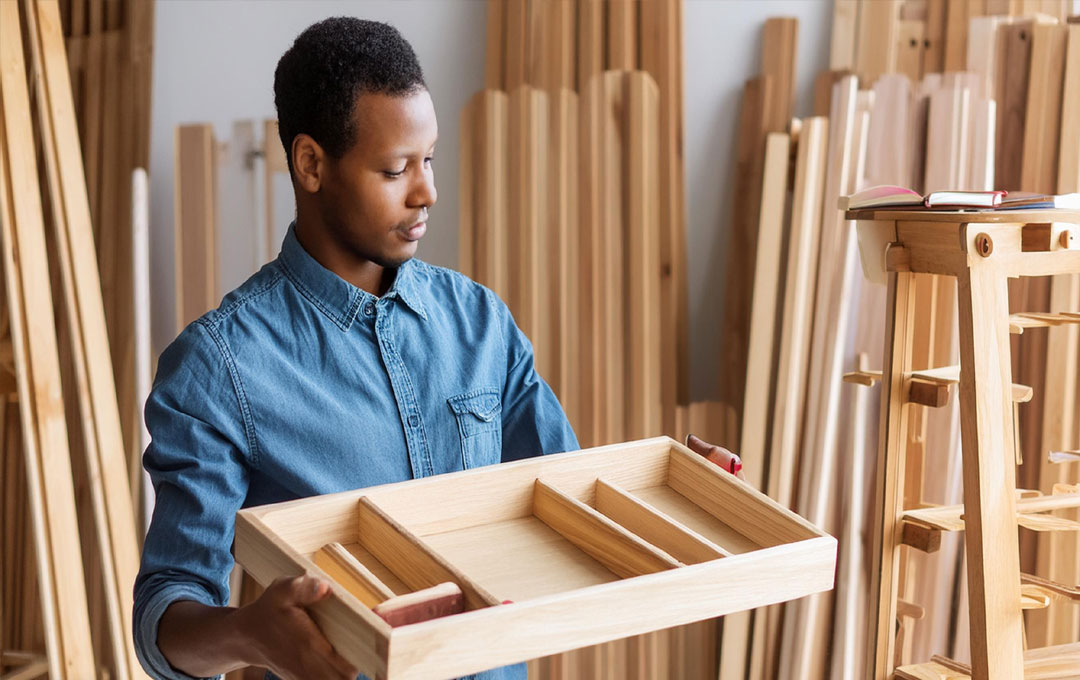
1. Wooden Serving Tray:
 Imagine yourself in your workshop, ready to embark on your first woodworking project. You’ve chosen to start with a wooden serving tray—a simple yet functional item that introduces you to basic Teds Woodworking techniques.
First, you gather your materials: a piece of wood for the tray base, wood glue, clamps, sandpaper, and a finish like varnish. You carefully measure and mark the wood, ensuring it’s the right size for your desired tray dimensions. Using a handsaw or a powered saw, you make precise cuts, creating the base of the tray.
Next, you cut additional pieces of wood for the sides and handles. These pieces will be glued to the base to form the structure of the tray. Applying wood glue to the edges, you join the pieces together and use clamps to hold them firmly in place while the glue sets. Patience is key here as you wait for the glue to dry completely.
Once the glue has dried, you remove the clamps and begin the sanding process. Using sandpaper, you smooth out any rough edges or surfaces, ensuring a sleek and professional finish. The tray starts to take shape, its simple yet elegant design showcasing your newfound woodworking skills.
Finally, it’s time for the finishing touches. You apply a coat of varnish to the wooden tray, enhancing its natural beauty and providing a protective layer. The wood grain comes alive, and you admire your handiwork—a functional and stylish serving tray ready to be used for gatherings or everyday use.
2. Simple Bookshelf:
After successfully completing your serving tray, you’re eager to tackle your next woodworking project: a simple bookshelf. This project introduces you to basic carpentry skills while creating a practical piece of furniture for your home.
You gather your materials: wood boards for the shelf sides, shelves, and back support, screws, a screwdriver, a drill, and a level. Planning is crucial, so you measure and cut the wood boards to the appropriate dimensions for the bookshelf components.
Assembling the bookshelf begins with attaching the shelf sides to the shelves using screws and a screwdriver or drill. You ensure everything is aligned correctly, using a level to check for straightness and stability. The back support piece is then attached to provide additional strength and prevent items from falling off the back of the shelf.
Once the structure is secure, you turn your attention to finishing details. Sanding the bookshelf smooths out any rough edges or surfaces, giving it a polished look. Depending on your preference, you may choose to apply a finish such as varnish or paint to protect the wood and add a touch of style.
With the bookshelf complete, you step back to admire your handiwork. The simple yet functional design fits seamlessly into your home, showcasing both your practical skills and creative flair. It’s a satisfying accomplishment and a testament to your growing expertise in woodworking.
These beginner-level projects— the Wooden Serving Tray and the Simple Bookshelf—serve as foundational steps in your Teds Woodworking journey. They provide hands-on experience with essential tools and techniques while allowing you to create useful and beautiful pieces for yourself or as gifts for others. As you continue to explore the world of woodworking, these projects will be fondly remembered as the starting point of your craft.
The Intermediate-Level Woodworking Projects :
1. Wooden Picture Frame:
 Picture frames are not just functional; they are also decorative elements that can enhance the beauty of any artwork or photograph. As an intermediate woodworker, you decide to take on the challenge of crafting a wooden picture frame.
You start by gathering your materials: wood stock, a miter saw (or handsaw with a miter box), wood glue, clamps, sandpaper, and a finish like varnish or paint. Planning is crucial, so you carefully measure and mark the wood stock, ensuring precise cuts at 45-degree angles to create the frame pieces.
Using a miter saw, you make the angled cuts with precision, creating the four pieces that will form the frame. These pieces are then glued together at the mitered edges, forming the rectangular shape of the frame. Clamps are used to hold the corners tightly while the wood glue sets, ensuring a strong and seamless joint.
Once the glue has dried, you remove the clamps and begin the sanding process. Sandpaper is used to smooth out any rough edges or imperfections, creating a sleek and professional finish. The frame is now ready for the final touches.
Applying a coat of varnish or paint enhances the natural beauty of the wood and provides protection. You may choose a finish that complements the artwork or photograph that will be displayed in the frame. After the finish has dried, you insert a glass pane and a backing board into the frame, completing the picture frame.
With the picture frame finished, you step back to admire your handiwork. The elegant and precise design highlights your skills as an intermediate woodworker, and the frame becomes a beautiful addition to your home or a thoughtful gift for someone special.
2. Coffee Table with Storage:
 A coffee table is a staple piece of furniture in many homes, providing a central place for gathering and relaxation. As an intermediate woodworker looking for a functional yet stylish project, you decide to build a coffee table with storage.
Gathering your materials, including plywood, wood glue, nails, a hammer, a saw (circular saw or table saw), hinges, and paint or stain, you begin the process of crafting the coffee table. Planning is crucial, so carefully measure and cut the plywood into pieces for the table’s top, sides, and storage compartments.
Using wood glue and nails, you assemble the table structure, including attaching the sides, top, and bottom of the storage compartments. Attention to detail is key as you ensure everything is square and aligned for stability. Hinges are attached to the storage compartment doors for easy opening and closing, adding functionality to the table.
With the structure complete, you turn your attention to finishing details. Sanding the entire coffee table smooths out any rough edges or surfaces, creating a polished look. You then apply a coat of paint or stain, enhancing the appearance of the wood and providing protection.
The coffee table with storage is now ready for use. Its functional design, combined with your craftsmanship as an intermediate woodworker, makes it a valuable addition to any living space. The storage compartments offer practicality, while the stylish design adds a touch of elegance to the room.
These intermediate-level projects—the Wooden Picture Frame and the Coffee Table with Storage—demonstrate your progression as a woodworker, showcasing your ability to work with precision, assembly, and finishing techniques. They are not only functional pieces but also reflections of your skills and creativity in woodworking.
The Advanced-Level Woodworking Projects :
1. Adirondack Chair:
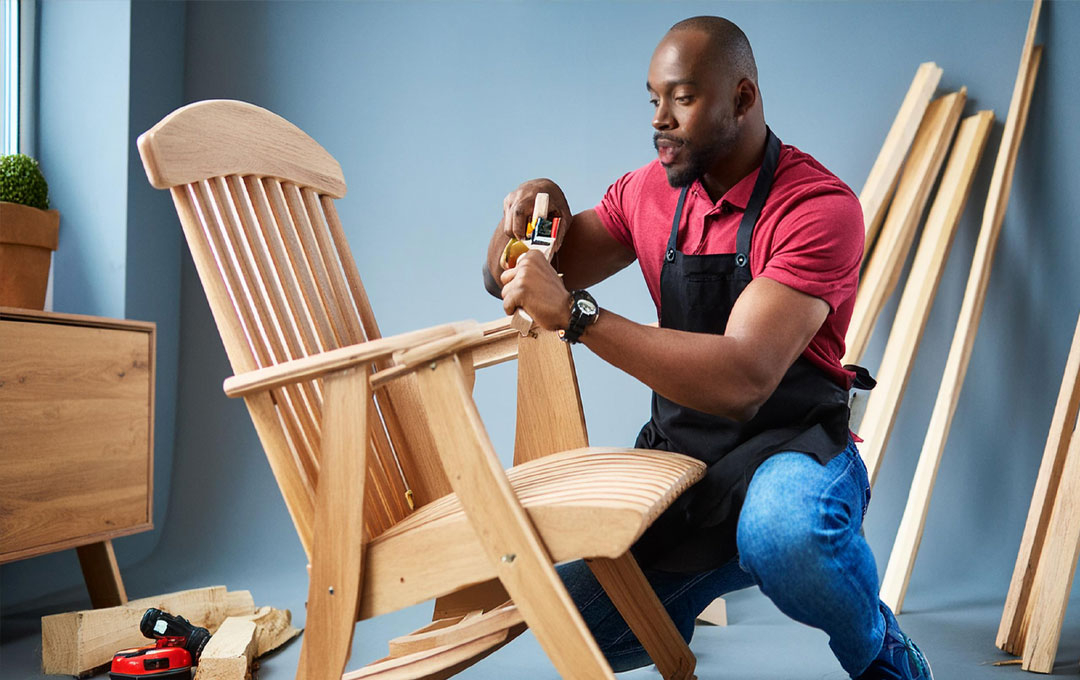 Building an Adirondack chair is a hallmark project for advanced woodworkers, combining intricate joinery, precision cutting, and attention to detail. As an advanced woodworker, you embark on this challenging yet rewarding project.
You gather your materials: cedar or teak wood for durability, a saw (such as a table saw or circular saw), a drill, screws, sandpaper, and a durable outdoor finish. The first step is to meticulously plan and measure, ensuring accuracy in cutting the wood pieces according to the plans for the chair.
The chair frame components are carefully cut and shaped, including the backrest, armrests, seat slats, and back slats. Joinery techniques such as mortise and tenon joints or dowels are used to assemble the chair frame, ensuring strength and stability.
With the frame assembled, attention turns to adding the seat and back slats. Each slat is precisely positioned and secured to the frame, creating a comfortable and aesthetically pleasing seating surface. Sanding the entire chair smooths out any rough edges or surfaces, preparing it for the finishing touches.
Applying a durable outdoor finish protects the wood from the elements while enhancing its natural beauty. Multiple coats may be necessary for optimal protection and longevity. Optional features like cup holders or a reclining mechanism can be added for additional functionality and comfort.
Upon completion, the Adirondack chair stands as a testament to your advanced woodworking skills. Its timeless design and craftsmanship make it a cherished piece for outdoor relaxation, showcasing your mastery of joinery, assembly, and finishing techniques.
2. Roll-Top Desk:
 Crafting a roll-top desk is a complex and challenging project that showcases advanced woodworking skills in joinery, intricate assembly, and fine detailing. As an advanced woodworker seeking a substantial and elegant project, you take on the roll-top desk with enthusiasm.
Gathering your materials, including hardwood boards (such as oak or cherry), a router, dowels, wood glue, sandpaper, and a high-quality varnish or finish, you begin the meticulous process of creating this functional and stylish desk.
The desk components are carefully planned and cut, including the sides, top, drawers, roll-top mechanism, and supporting structure. Using precise joinery techniques such as dovetails or mortise and tenon joints, the desk carcass is assembled, ensuring structural integrity and longevity.
The roll-top mechanism is a highlight of the desk, requiring intricate grooves and tracks created with a router. Attention to detail is paramount as you ensure smooth operation and a seamless fit for the roll-top.
After assembly, the desk is meticulously sanded to a smooth finish, preparing it for the final steps. Multiple coats of varnish or finish are applied, enhancing the beauty of the wood and providing protection.
Optional decorative elements such as inlays or trim can be added to personalize the desk further. Drawer slides are installed for smooth drawer operation, and the desk is tested for functionality and durability.
Upon completion, the roll-top desk stands as a masterpiece of woodworking craftsmanship. Its elegant design, functional features, and meticulous detailing reflect your expertise as an advanced woodworker, making it a prized and functional addition to any workspace.
These advanced-level projects—the Adirondack Chair and the Roll-Top Desk—demonstrate the pinnacle of Teds Woodworking skills, showcasing your ability to work with precision, complexity, and artistry. They are not just functional pieces but also works of art that highlight your mastery and passion for woodworking.
| Instant Access To All 16,000 Projects with step-by-step details, drawings, plans, cutting & materials list and more… |
Additional Tips For Success In Woodworking Projects :
 Detailed Planning and Design: Before starting any woodworking project, invest time in detailed planning and design. Create accurate measurements, sketches, and a materials list. Consider factors such as wood type, joinery techniques, hardware, and finishing options. A well-thought-out plan reduces errors and ensures a smoother project execution.
Selecting Quality Materials: Choose high-quality materials suitable for the specific project. For furniture intended for outdoor use, opt for durable woods like cedar or teak that can withstand weather exposure. Use hardwoods like oak or maple for indoor furniture for their strength and beauty. Quality materials contribute to the longevity and aesthetics of the final piece.
Mastering Joinery Techniques: Intermediate and advanced woodworking projects often require advanced joinery techniques such as dovetails, mortise and tenon joints, and finger joints. Take time to practice and master these techniques before attempting complex projects. Properly executed joinery enhances the structural integrity and visual appeal of the finished piece.
Precision Cutting and Measurement: Accuracy in cutting and measurement is paramount in woodworking, especially for intricate designs and joinery. Use high-quality measuring tools like a combination square, marking gauge, and precision rulers. Invest in a reliable saw with sharp blades for precise cuts that fit together seamlessly.
Utilizing Power Tools Safely: Advanced projects often involve power tools like routers, table saws, and drills. Prioritize safety by wearing appropriate protective gear such as safety goggles, ear protection, and gloves. Familiarize yourself with each tool’s operation and safety features to prevent accidents and ensure smooth workflow.
Patience and Attention to Detail: Woodworking requires patience and attention to detail at every stage of the project. Take the time to sand surfaces meticulously for a smooth finish, align joinery precisely, and check measurements repeatedly. Small details like sharp corners, flush joints, and consistent spacing make a significant difference in the final outcome.
Finishing Techniques: Mastering finishing techniques is essential for enhancing the appearance and durability of woodworking projects. Experiment with different finishes such as stains, varnishes, oils, or paints to achieve the desired look. Follow manufacturer instructions for application and drying times, and apply multiple coats for optimal protection and sheen.
Continuous Learning and Improvement: Woodworking is a lifelong learning journey. Seek out resources such as books, online tutorials, workshops, and community forums to expand your knowledge and skills. Learn from mistakes and successes, and continually challenge yourself with new techniques and projects to grow as a woodworker.
By incorporating these additional tips into your woodworking practice, you’ll set yourself up for success in tackling intermediate and advanced-level projects with confidence and skill. Remember that each project is an opportunity to learn and refine your craftsmanship, leading to greater satisfaction and mastery in the art of woodworking.
In conclusion
Teds Woodworking is a versatile and rewarding craft that offers a wide range of projects suitable for beginners, intermediate, and advanced woodworkers. Starting with simple projects like a wooden serving tray or a basic bookshelf allows beginners to learn foundational skills and gain confidence in using woodworking tools and techniques. As woodworkers progress to intermediate-level projects such as a wooden picture frame or a coffee table with storage, they refine their abilities in precision cutting, assembly, and finishing.
For advanced woodworkers, projects like an Adirondack chair or a roll-top desk present exciting challenges that showcase mastery of joinery, complex assembly, and detailed finishing. These projects require meticulous planning, attention to detail, and a deep understanding of woodworking principles. Through continuous learning, practice, and a commitment to quality craftsmanship, woodworkers can create heirloom-quality pieces that reflect their skill and creativity.
Regardless of skill level, success in Teds Woodworking hinges on careful planning, selecting quality materials, mastering joinery techniques, utilizing power tools safely, and paying attention to finishing details. Patience, practice, and a dedication to continuous improvement are essential elements of success in this timeless craft. With each project completed, woodworkers not only hone their skills but also experience the satisfaction of creating functional and beautiful pieces with their own hands.
In the end, woodworking is more than just a hobby or a craft—it’s a journey of creativity, skill development, and personal fulfillment. Whether you’re just starting out or have years of experience, the world of woodworking offers endless possibilities for learning, growth, and artistic expression. Happy woodworking!


1 comment on “Teds Woodworking”